Key Takeaways
- A Shopify pre-launch checklist helps you test your store before real customers start buying.
- At minimum, review products, collections, navigation, payments, shipping, taxes, checkout, policies, emails, SEO, analytics, and mobile performance.
- Place at least one test order before launch. Shopify says test orders help verify checkout, order processing, inventory, shipping, emails, and taxes.
- If you use Shopify Payments, test mode can simulate transactions. If you do not use Shopify Payments, Shopify’s Bogus Gateway can be used for checkout testing.
- If you sell B2B or wholesale, also test customer login, company setup, catalogs, pricing, payment terms, checkout settings, and the test buyer experience.
- Before launch, also check whether your Thank you and Order status pages need to be upgraded or whether old scripts and tracking need to be replaced.
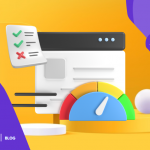
Launching a Shopify store is exciting, but it is easy to miss small details before going live.
A broken payment method, missing shipping rate, wrong tax setup, slow product page, weak mobile layout, missing policy page, or broken tracking event can affect sales from day one.
That is why a Shopify pre-launch checklist is useful. It helps you review the store before customers start visiting, placing orders, and contacting support.
This checklist covers the main things to check before launching a Shopify store in 2026, including products, payments, checkout, shipping, taxes, SEO, mobile experience, analytics, email, speed, test orders, and B2B or wholesale workflows where relevant.
Why follow this Shopify Pre-launch checklist?
A pre-launch checklist helps you catch important issues before real customers do.
By following this checklist, you can:
- Make sure your Shopify store is ready for customers
- Check that products, collections, pricing, and discounts are set up correctly
- Confirm that payments, shipping, taxes, and checkout work properly
- Test your store on mobile and desktop
- Review SEO, analytics, pixels, and tracking before launch
- Make sure store policies and contact information are visible
- Test customer emails, order confirmation, and fulfillment settings
- Avoid simple mistakes that can hurt first-day conversions
This checklist is not a legal, tax, or compliance replacement. It is a practical store launch guide. If you sell regulated products, sell internationally, or collect taxes in multiple regions, confirm your setup with the right professional before launch.
25-point Shopify Pre-Launch Checklist
1. Choose a niche/vertical
This is the first and foremost thing to do before starting off with your Shopify journey. Picking the right niche is very important as it will help you focus on a particular group of people to whom you want to sell your products/services.
There are a few things to consider when choosing your niche:
- What are you passionate about?
- What does the market demand?
- What kind of products are trending?
- Who is your target audience?
- How are you going to target a specific industry?
- What are the duties and import taxes for selling from your region?
Once you have considered these factors, it’s time to move on to the next step.
2. Research your competition
Once you’ve zeroed in on your niche, it’s time to research your competition. Check out their stores, see what they’re doing well and identify any gaps that you can fill.
Competitor analysis will also give you some ideas about pricing, product offerings, and marketing strategies that you can use for your own store.
3. Create buyer persona(s)
Understanding the potential buyers of your products is the most sensible thing to do before starting and scaling your business. A buyer persona consists of elements discovered after market research. The elements include their interests, age, location, pain points, and other similar things that define a potential audience type for your specific products.
Crafting multiple buyer personas will help you understand your target audience better and market to them more effectively.
4. Choose and buy a domain name
Your domain name is considered as an identity of your business. It is one of the most important pre-launch activities to do if you want to build a recognizable brand in the future.
It is advisable to purchase a domain name that is most relevant to your business and easily memorable at the same time. If you don’t have a domain name yet, you can purchase one when you set up your Shopify store.
5. Set up your store
Now that you know who you’re targeting and what kind of products/services you’ll be selling, it’s time to set up your Shopify store with the domain name you bought. This includes choosing a theme, adding products/services, shipping rates, etc.
Setting up a store can involve a lot of moving parts, theme configuration, product structure, navigation, and performance. If you’d rather not piece it together alone, you can work with a Shopify development agency to get the foundation built correctly from the start, so you’re not fixing structural issues after launch
6. Integrate a payment gateway to accept payments
Add the integration of a payment gateway (Shopify Payments) to your list of things to do before your store launch. Implementation of a secured payment gateway will allow you to accept payments from your customers in your store.
But, before implementing, evaluate multiple options and look for features that are most suitable to you (such as payments in multiple currencies, fewer transaction charges, etc.)
7. Install an SSL certificate on your store
An SSL certificate is a digital certificate that encrypts information sent from a customer’s browser to your server. This helps protect sensitive data, such as credit card numbers, from being intercepted by hackers.
Also Read: Shopify Security: Its Importance, Checklist and Tools [2026]
You can purchase an SSL certificate from a provider like DigiCert or GeoTrust, or you can get one for free through Shopify.
8. Add a Custom Forms to your store
Having different types of forms in Shopify can help you boost your product sales. They offer a great way for you to customize your offerings and your process of taking orders from the customers.
With custom forms on your Shopify store, you can also upsell and cross-sell your products and earn more from each order. There are many order form apps available on the Shopify App Store that you can use.
9. Add a live chat or chatbot app to your store
Adding a live chat app or a chatbot to your store can help you provide better customer support and build relationships with your customers. There are several live chat apps available on the Shopify App Store, such as Tidio, Drift, and Intercom.
Adding this to your pre-launch checklist will make sure your real-time customer support is sorted.
10. Set up shipping rates
If you plan on selling physical products in your store, then you’ll need to set up shipping rates for your products. This includes deciding on which carriers you’ll use (USPS, UPS, FedEx, etc.), what kind of shipping methods you’ll offer (standard, expedited, express), and how much you’ll charge for each option.
Inside your store, you can decide shipping rates based on the minimum order value or minimum weight of the items added to the cart. (This can be automated using a Shopify app like Wholesale Pricing Discount).
Read Also: How To Set Wholesale Shipping Rates In Shopify: The Ultimate Guide
11. Choose an accounting app
Keeping track of your finances is important for any business, and there are several accounting apps available on the Shopify App Store that can help you with this. Implementing an accounting app before the store launch will help you ease your mind and later give you financial insights such as your inventory pricing, profits, losses, revenue forecast and even accounting history.
12. Install an abandoned cart app
Before launching your store, you might want to implement an app that can help you take follow-ups with your customers for the products that they added to their carts but couldn’t place an order. Installing abandoned cart apps offers a great way to boost your conversion rate and bring back lost sales.
14. Do technical SEO for your Shopify site
Technical SEO is the process of optimizing your store for Google’s search algorithm. It helps you rank higher in the search engine result pages (SERPs) for the search queries. Technical SEO includes things like creating a sitemap, adding alt text to images, setting up redirects, adding breadcrumbs, etc.
While there’s no guarantee that your store will rank immediately on Google just after the launch, doing technical SEO will give you the best chance of being found by potential customers.
Read Also: Shopify Marketing – All You Need to Know
15. Check your store’s loading speed and performance
Slow loading times of your store can hurt your conversion rate and you can end up losing your very first customers. Use Google’s PageSpeed Insights tool to check your store’s loading speed and performance and apply the suggested fixes accordingly.
16. Check if your store is mobile and tablet-friendly
Over the last few decades, the adoption of mobile and tablet technology has increased immensely. People are now shopping for products more on mobile as compared to on their personal computers or laptops. So, it is important to optimize your Shopify store and make it mobile and tablet-friendly. You can use this Mobile-Friendly Test tool by Google and check if your store is optimized for mobile view.
make sure that your store is optimized for these shoppers. Use Google’s Mobile-Friendly Test tool to check if your store is mobile and tablet-friendly.
17. Connect Google Analytics (GA4) with your store
Connecting your Shopify store with the Google Analytics tool will help you keep track of your store traffic. Google Analytics 4 (GA4) is free to use tool that offers some great insights into the type of traffic, traffic origin, actions performed on your store, a detailed reporting view and much more. It’s a valuable resource for understanding your customers and making data-driven decisions about your marketing efforts.
To install Google Analytics, simply create a free account and then follow Shopify’s instructions for connecting it to your store.
18. Set up Google Search Console
Google Search Console is also a free tool that allows you to see how your store is performing on Google search engine result pages (SERPs). It also provides valuable insights into your store traffic and can help you troubleshoot any issues that you’re having.
To set up Google Search Console, simply create a free account and then follow Shopify’s instructions for connecting it to your store.
19. Create social media entities for your business
Creating social media entities before launching your store will help you connect with the potential audience or the buyer personas that you crafted. You can also run ads on social media to promote your products or generate leads with a pre-launch ad campaign.
Furthermore, with the help of your social media accounts, you can engage your new and existing customers by providing them with quality content on daily basis.
So, create accounts on the major platforms (Facebook, Twitter, Instagram, etc.) and make sure to fill out your profiles completely. And make sure you add the hyperlinks of your social handles to your store (maybe at the top or at the bottom in the footer section) so that your site visitors can find and follow you on social media with a couple of clicks.
20. Install an email marketing app
This is not mandatory but you can also include this in your pre-launch checklist. Having an email marketing app will help you store your customers’ names, email addresses and other information. You can even send launch notifications to your customers that have signed up on your store or subscribed to your email newsletter.
There are several email marketing apps available on the Shopify App Store, such as MailChimp, Klaviyo, and Constant Contact. Pick one that you think will work best for your business and then follow their instructions for setting it up.
21. Upgrade your on-site search engine
On-site search engines have become one of the most valuable yet underrated components of e-commerce stores. According to studies, more than 60% of visitors use the search bar to find their desired products with a 2.4 times higher probability of making a purchase over those who don’t.
While not absolutely essential, a good search app can significantly increase your store’s conversion rate and enhance customer retention. To get the maximum results, we recommend choosing an AI-powered search app!
22. Create a landing page to accept pre-orders
A landing page is a page that you can add to your store that is designed to capture leads or details of potential customers. A landing page typically contains an opt-in form where visitors can sign up for your email list or drop in their email for pre-ordering any product on your store.
Creating a separate landing page is a great way to build your list of potential customers before you launch your store. You can use Shopify’s built-in landing page tool, or you can install an app from the app store.
23. Set a launch date
Once you’ve completed all of the items on this checklist, it’s time to set a launch date for your store. Make sure to give yourself enough time to promote your store and drive traffic to it before you open for business.
A good rule of thumb is to launch your store at least two weeks before your official launch date. This will give you time to fix any last-minute issues and ensure that everything is running smoothly.
24. Promote your launch
Now that you have a launch date set, it’s time to start promoting your store and take pre-orders.
To promote your store launch, you can publish posts on social media, run ads on social media (ex: FB Ads) or search engines (ex: Google Adwords), email to your leads or potential customers, create community pages and invite influences to talk about your products, etc.
Make sure to create a buzz around your launch and get people excited about shopping at your store. Driving early traffic takes a coordinated push across paid social, search, and email. If you want help turning launch buzz into actual sales, partnering with a Shopify growth agency can help you plan and run campaigns that convert from day one
25. Go live and Celebrate your success!
Once you’ve promoted your launch and everything is ready to go, it’s time to open your doors and start selling.
You’ve worked hard to get your store up and running, so make sure to take some time to celebrate your success! Grab a drink, tell your friends and family about your accomplishment, and enjoy the fruits of your labor.
Congratulations on launching your Shopify store!
May 2026 Checkout Tracking Note
Before launching or relaunching a Shopify store in 2026, check your Thank you and Order status page setup.
Shopify says non-Plus stores have until August 26, 2026 to upgrade their existing Thank you and Order status pages to the new version. If you use old additional scripts, tracking scripts, pixels, or page customizations, you need to review and replace them with compatible blocks, web pixels, app pixels, or updated app customizations.
This matters because purchase tracking, Google Ads conversions, GA4 events, Meta Pixel events, post-purchase apps, and order status customizations can be affected.
Before launch, test:
- Purchase event
- Thank you page tracking
- Order status page tracking
- App pixels
- GA4
- Google Ads conversions
- Meta Pixel
- Post-purchase apps
- Customer emails
Keep this section short. It adds freshness and accuracy without turning the article into a checkout extensibility guide.
When native B2B is not enough, Wholesale Pricing Discount B2B is the next step.
Try our Wholesale Pricing Discount app for free !
Trusted by over 16,000 Shopify merchants
Conclusion
By following this Ultimate Shopify Pre-Launch Checklist, you are one step closer to launching your very own successful Shopify store! Just remember to take things slowly and don’t try to do everything at once—you’ll be up and running in no time.
Thanks for reading! If you have any questions about this checklist or anything else related to pre-launching a Shopify store? Let us know in the comments below 🙂
Frequently Asked Questions
What should be my first step according to the Shopify launch checklist before opening my store?
The first step is choosing a niche or vertical for your store. It’s crucial because it defines your target audience and shapes your product offerings, ensuring you cater to specific customer needs effectively.
Why is researching my competition recommended in the e-commerce checklist?
Researching your competition helps you understand market trends, identify what works well for others, and uncover gaps in their offerings. This insight can guide you to position your store uniquely and competitively.
What’s the significance of setting up shipping rates as mentioned in the e-commerce launch checklist?
Setting up shipping rates is essential for providing clarity and trust to your customers regarding delivery costs. It also allows you to offer competitive shipping options, enhancing customer satisfaction and retention.
How important is installing an SSL certificate for my online store?
An SSL certificate encrypts data between the server and the user, ensuring the security of sensitive information. It’s vital for protecting customer data and boosting confidence in your site’s security.
What role does an abandoned cart app play in my Shopify store’s success?
An abandoned cart app helps recover potential sales by reminding customers of items they’ve left in their cart. It’s a powerful tool for increasing conversion rates and maximizing revenue.
Do I need to update Thank you and Order status pages before launch?
If your store uses older Thank you and Order status page customizations, scripts, or pixels, yes. Shopify says non-Plus stores must upgrade existing Thank you and Order status pages by August 26, 2026.


")